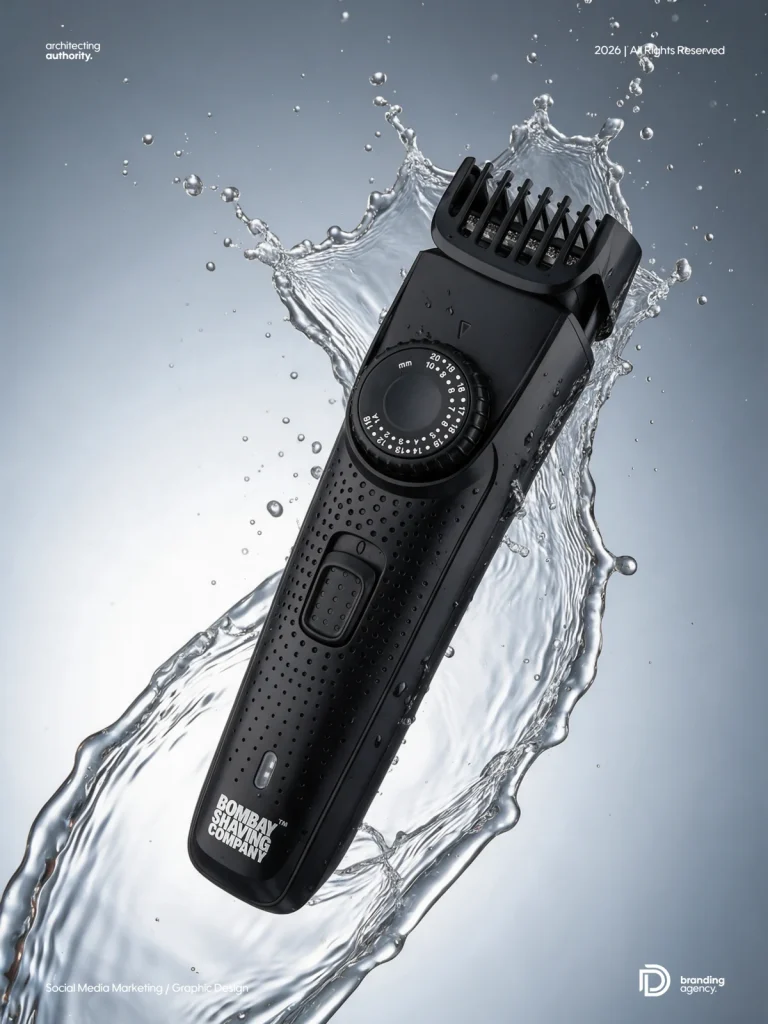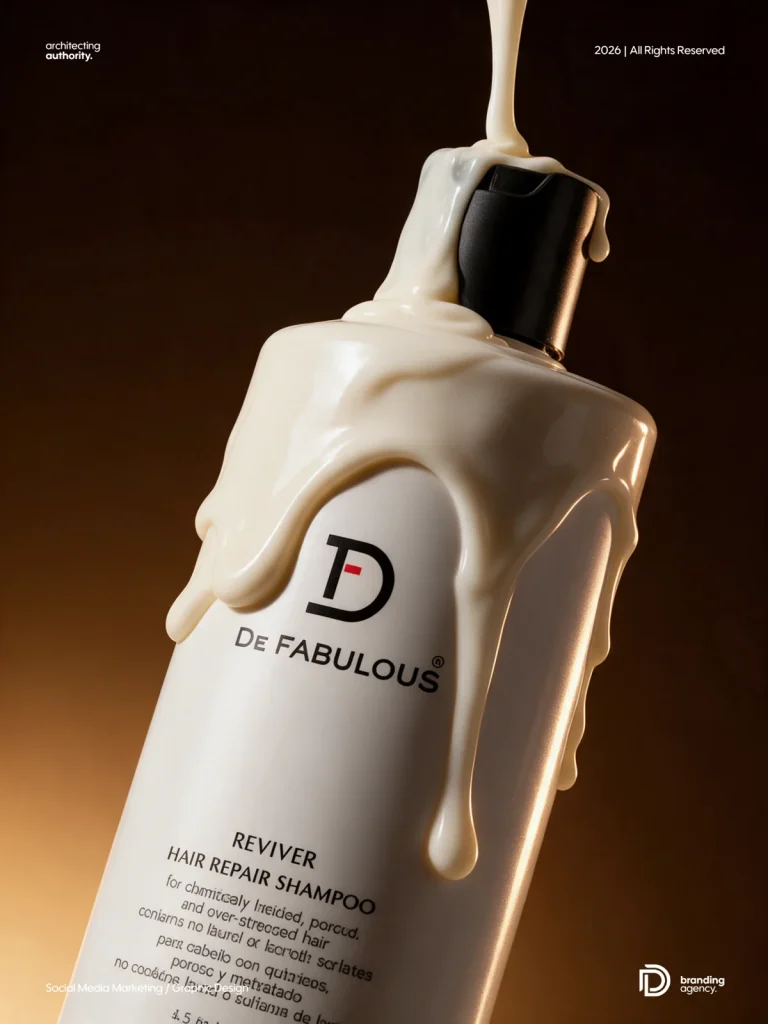
Use Image 1 to define the scene and Image 2 to define your real product. Keep the complete prompt, then check the label, closure, proportions and skin texture before using the result.
A successful beauty campaign image depends on more than a polished background. The packaging needs to remain recognizable, liquid needs believable weight, and skin needs visible texture. These nine AI beauty product photography prompts use a two-image workflow to describe those details explicitly.
Each section includes the complete prompt from Digital Arnab’s source document, its original composition reference and, where supplied, a matching campaign example. All eight uploaded examples are included below. Image captions stay beneath the artwork.
How to use these beauty product replacement prompts
- Choose one scene. Select the composition that fits your campaign rather than combining multiple setups.
- Attach Image 1. Open the original scene reference in that section and use it as your composition, camera and lighting reference.
- Attach Image 2. Upload a clear photograph of your real product with readable packaging.
- Copy the complete prompt. Keep all product-accuracy, lighting, material and finish instructions.
- Set the requested frame. Follow the aspect ratio in the chosen prompt. The supplied examples are illustrative and may use a different frame.
- Review before using the output. Compare packaging, skin, hands, texture and physical construction with your references, then correct one issue at a time.
Brush macro exception: for Prompt 4, Image 2 defines the cosmetic formula or replacement brush. Preserve the original application scene instead of adding a bottle to it.
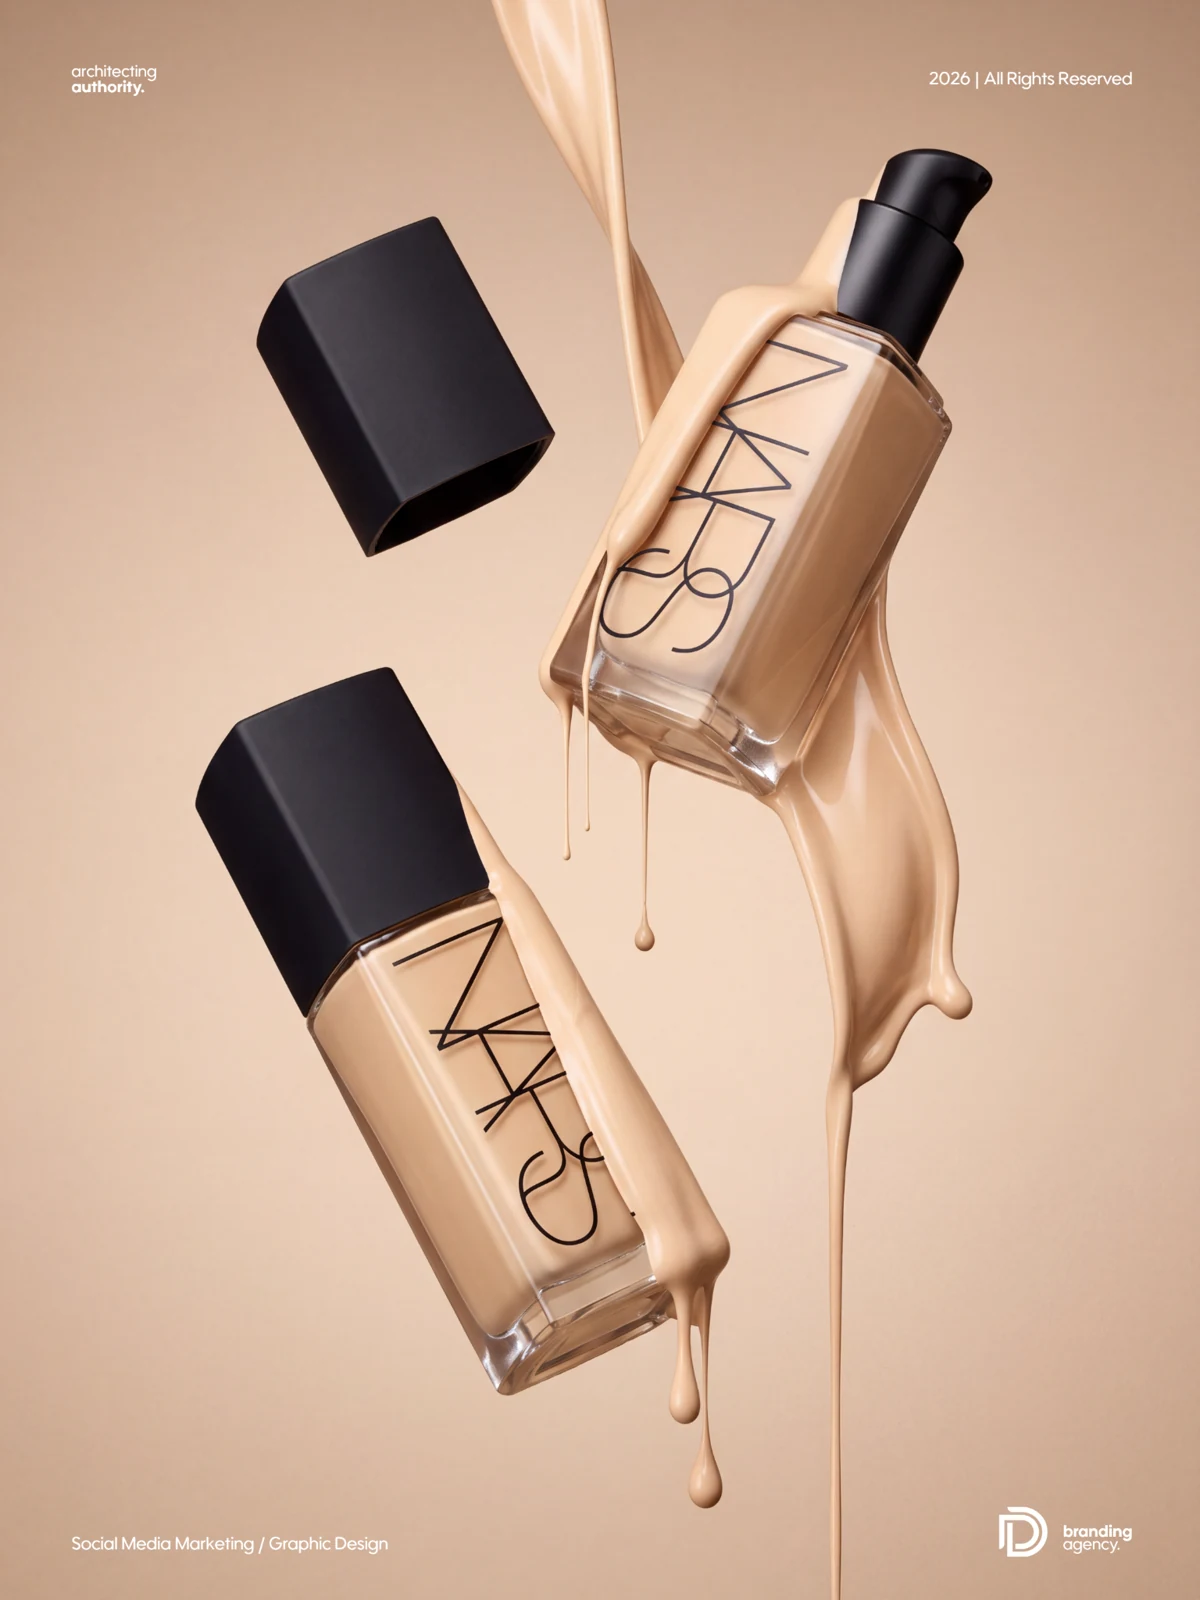
01. Floating products with cream ribbons
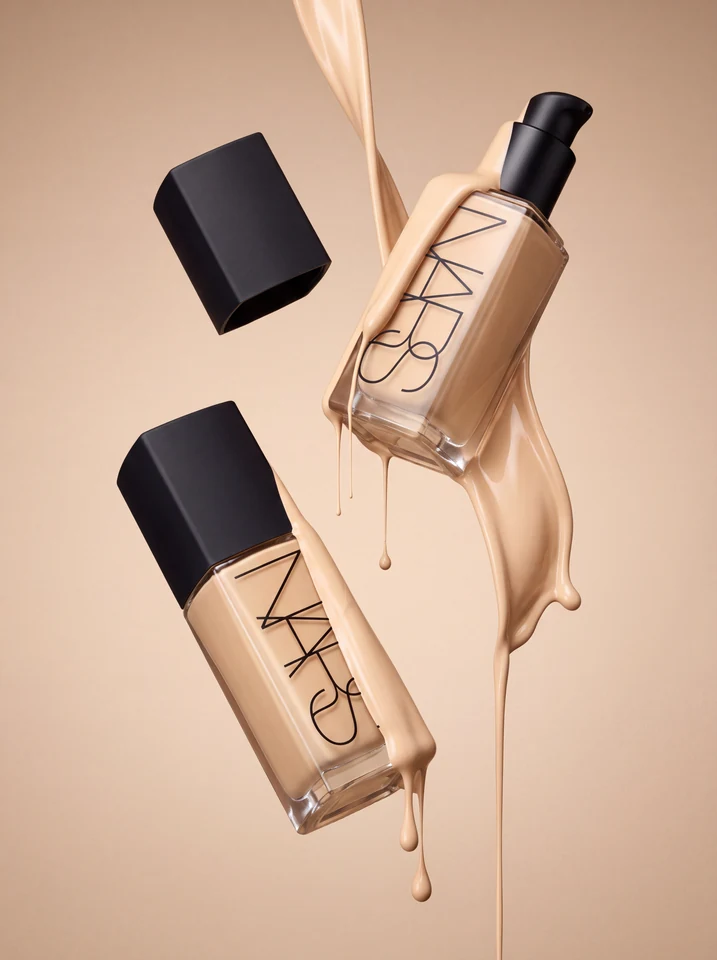
A floating product composition built around controlled cream ribbons, opposing bottle angles and clear label visibility.
View original scene reference (Image 1)
Copy this complete prompt into your image editor:
Create a photorealistic luxury product campaign image using Image 1 as the exact reference for composition, camera angle, lighting, background, and liquid effects. Replace the reference bottles with the product from Image 2.
COMPOSITION: Vertical 3:4 frame. Two copies of my product floating in midair, arranged diagonally. The upper product sits in the upper-right area, its top leaning right and base leaning left. The lower product sits in the lower-left area, its top leaning left and base leaning right. Both front labels face the camera, following the reference's rotations and perspective. Preserve the reference's spacing, relative product sizes, and generous negative space. Include one detached cap floating in the upper-left area only if my product has a removable cap. Match my product's actual closure and opening mechanism.
PRODUCT ACCURACY: Preserve my product's exact silhouette, proportions, packaging colour, material, cap, logo, typography, label artwork, and every visible printed detail. Keep branding sharp, readable, and correctly aligned with the package perspective. Do not transfer the reference brand or redesign my packaging.
LIQUID EFFECT: Recreate the thick, glossy, warm ivory-beige cream from the reference. A smooth ribbon drapes over the upper product's top and left edge, with thin strands dripping beneath its base. A broader flowing sheet wraps around the lower product's right side, ending in rounded droplets and one long vertical strand extending toward the bottom edge. Maintain realistic viscosity, surface tension, soft folds, and subtle specular highlights. Keep the main branding visible.
CAMERA AND LIGHTING: Match the reference's close-up studio perspective, viewing the floating products slightly from below so their bases are visible. Use soft directional light from the upper-left, warm highlights, gentle shadows, realistic reflections, and crisp packaging detail. Both products remain in focus.
BACKGROUND: Seamless warm beige studio background with a subtle tonal gradient, matching the reference. No horizon, floor, props, or cast shadows suggesting a surface.
FINISH: Premium commercial product photography, physically realistic materials, smooth cream texture, clean edges, high resolution. No added text, watermarks, extra products, distorted packaging, invented label text, or excessive splashes.
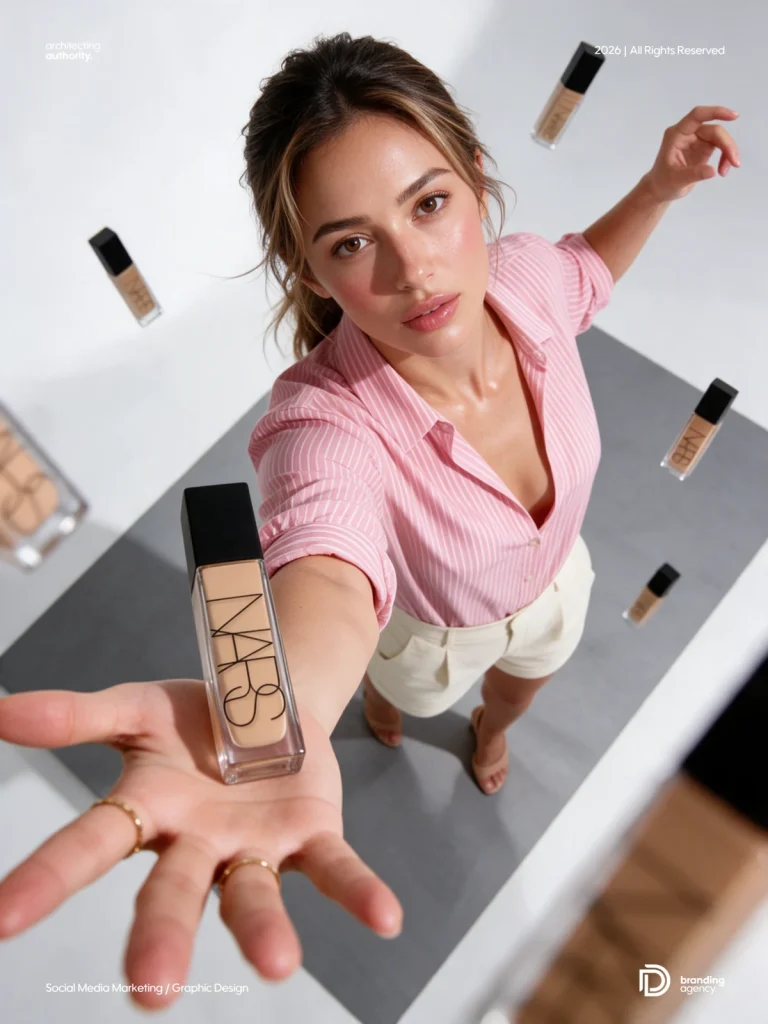
02. High-angle model with floating products
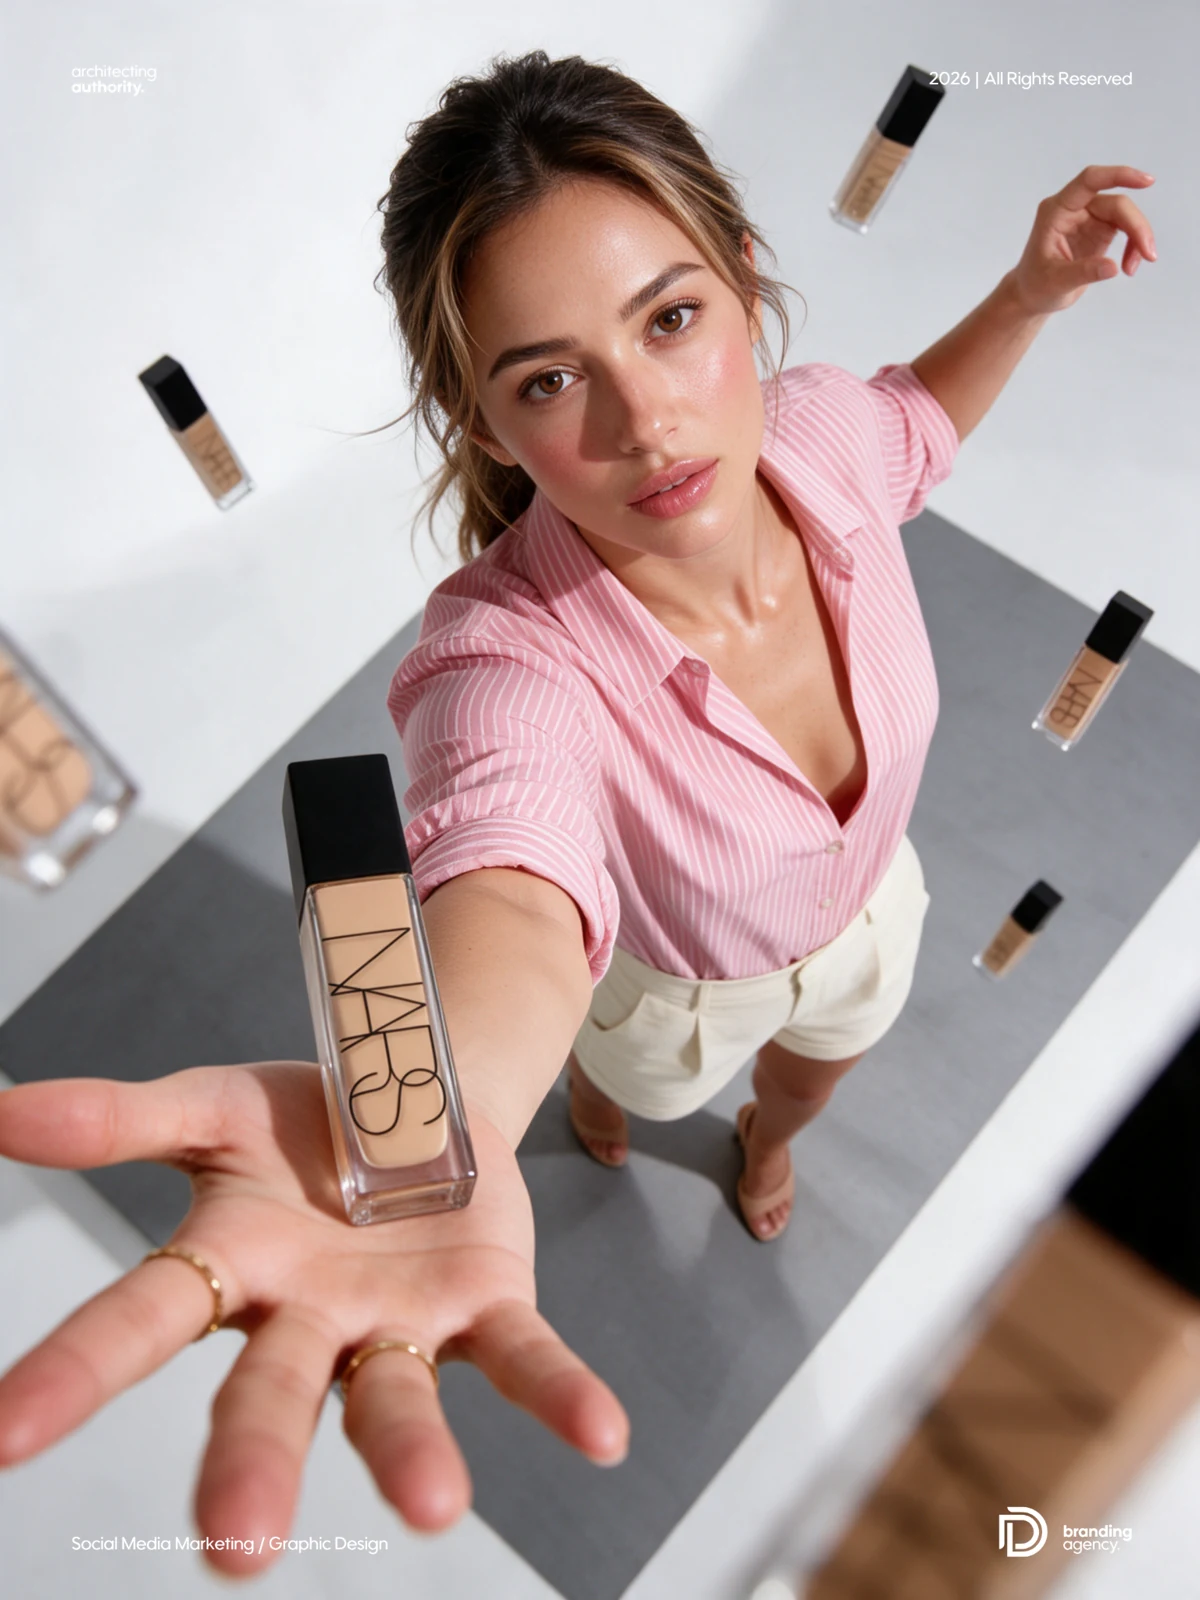
A high-angle beauty scene that uses an extended hand and suspended products to create depth while preserving natural skin.
View original scene reference (Image 1)
Copy this complete prompt into your image editor:
Create a photorealistic beauty campaign photograph using Image 1 as the exact visual reference. Replace all reference products with my product from Image 2 while preserving the model, pose, skin tone, skin texture, camera angle, lighting, and composition.
CAMERA AND FRAMING: Vertical 3:4. Match the dramatic high-angle, wide-angle perspective, with the camera above the model looking steeply downward. Preserve the strong foreshortening: her outstretched hand appears large in the lower-left foreground, while her body and legs recede beneath her. Her face sits near the upper-middle, looking directly into the lens. Maintain the original camera distance, perspective distortion, framing, and placement of every element.
MODEL AND SKIN: Preserve the reference model's facial structure, warm light-medium skin tone, golden undertone, expression, and body proportions. Retain realistic pores, fine peach fuzz, subtle skin creases, natural tonal variation, and the luminous highlights on her forehead, nose, cheeks, lips, neck, and chest. Keep the original brown eyes, defined brows, soft blush, glossy pink lips, and brown hair with lighter strands, tied back with loose strands framing her face. No skin whitening, airbrushing, waxy texture, or exaggerated sharpening.
POSE AND HANDS: Match the extended arm and open palm reaching toward the camera, with naturally spread fingers beneath the foreground product. Preserve finger lengths, joints, palm lines, nail shape, skin texture, and delicate gold rings. Keep the other arm raised toward the upper-right with its relaxed, curved finger gesture. Maintain anatomically correct hands and believable product scale relative to the palm; do not change the pose into a closed grip.
WARDROBE: Preserve the pink striped collared shirt, rolled sleeves, cream high-waisted shorts, and nude open-toe heels. Retain realistic fabric weave, seams, folds, and shadows.
PRODUCT PLACEMENT: Position the main replacement product immediately above the extended foreground palm, matching the reference's angle and apparent size. Arrange additional copies floating in the same positions: a cropped, softly blurred product at the left edge; a small product near the upper-left; another near the upper-right; one at the middle-right edge; one beside the lower-right of her torso; and a large, heavily blurred product cropped by the bottom-right edge. Preserve their individual rotations, depth, and cropping. Match the reference's focus hierarchy, with the face and main product clear and the nearest peripheral products softly blurred.
PRODUCT ACCURACY: Use my product's exact shape, dimensions, proportions, packaging colour, finish, closure, logo, and label artwork. Preserve all original printed text and its alignment. Keep the main product branding readable. Match the supplied product's actual open or closed state; do not invent exposed contents, caps, or packaging features.
LIGHTING AND SET: Match the reference's bright, soft studio lighting from above and the upper-left, producing luminous skin highlights and gentle directional shadows beneath the model. Preserve the pale grey-white environment and the large grey rectangular floor platform beneath her, seen diagonally with its original boundaries and perspective. Maintain the neutral colour balance, exposure, and soft shadow falloff. Premium editorial beauty photography with realistic skin, packaging materials, reflections, and optical depth. No added text, reference-brand logos, extra fingers, altered face, distorted labels, artificial skin smoothing, or changes to the camera angle.
03. Product framed by a sculptural cream splash
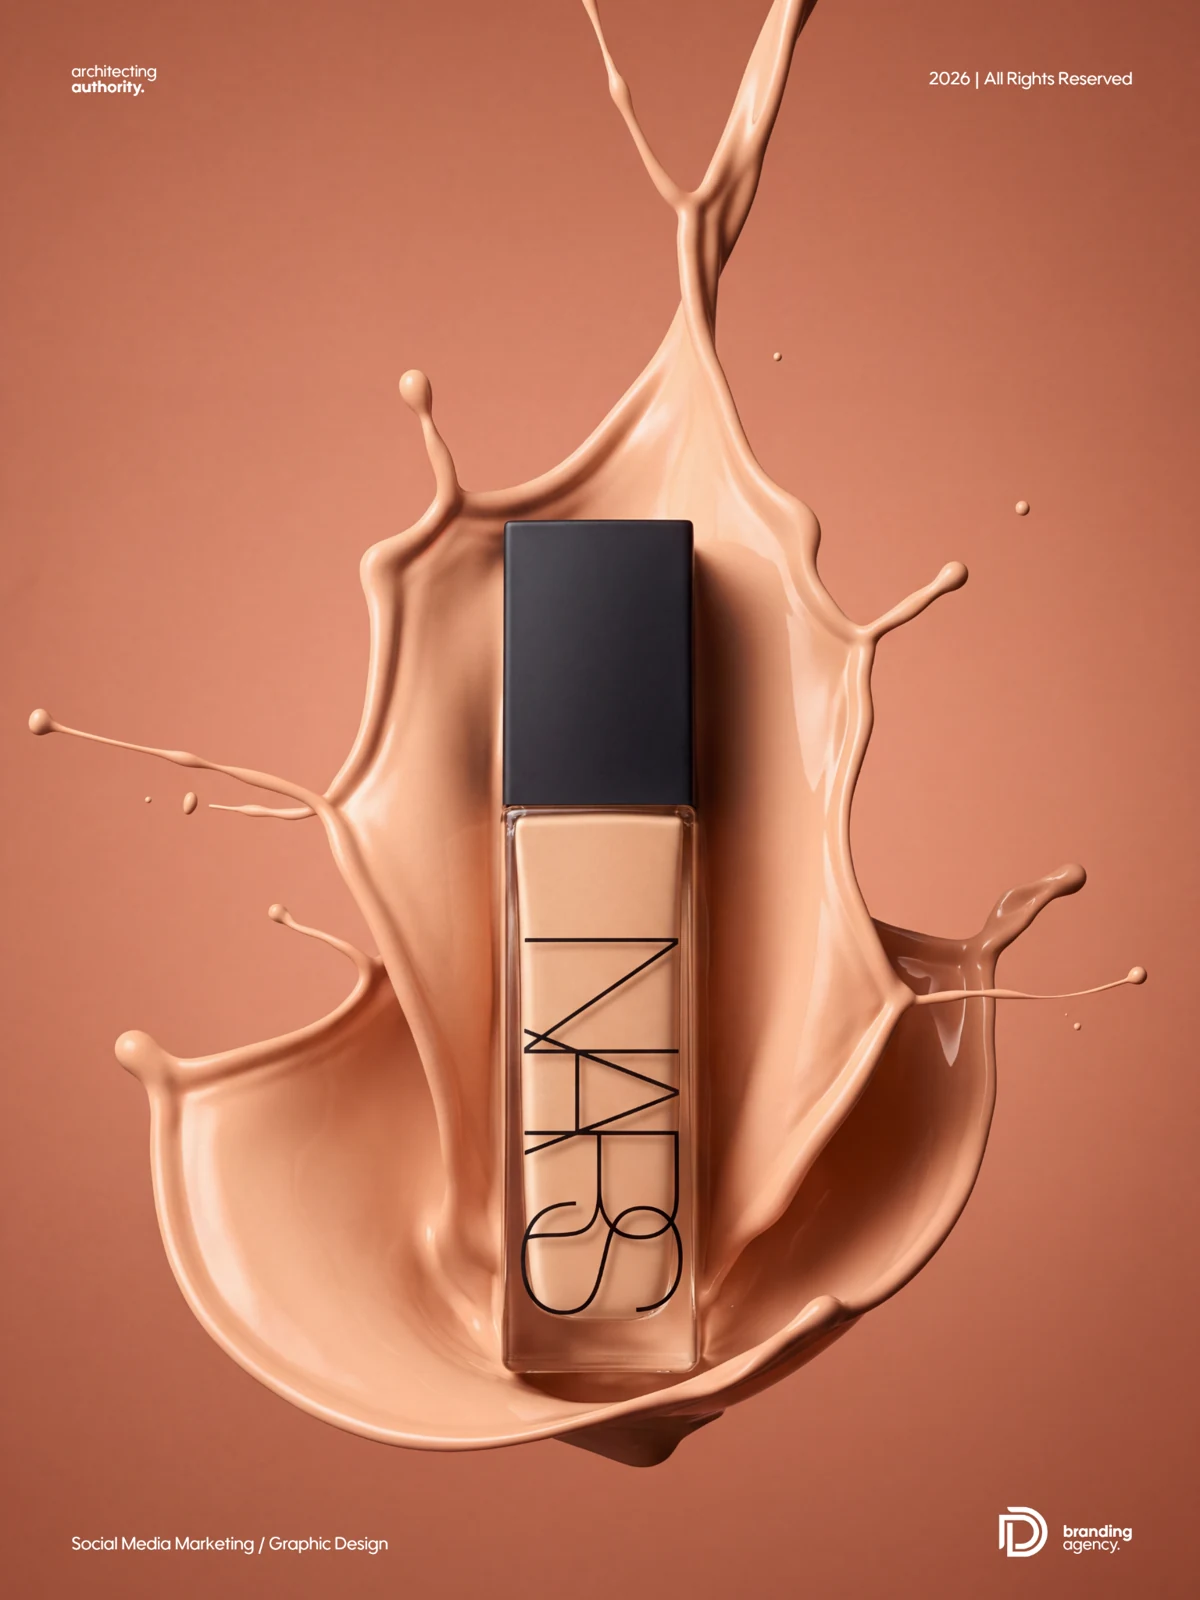
A centered product hero with a sculptural cream splash and a warm peach studio background.
View original scene reference (Image 1)
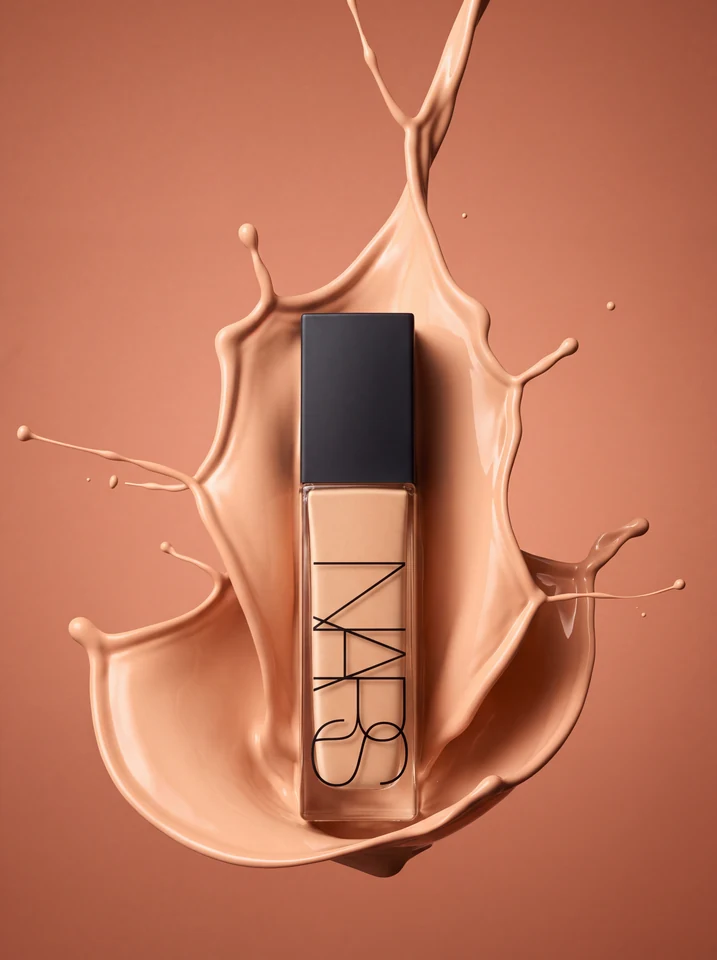
Copy this complete prompt into your image editor:
Create a photorealistic premium product campaign image. Use Image 1 as the exact reference for camera angle, framing, composition, lighting, colour palette, and splash geometry. Replace the central bottle with my product from Image 2.
COMPOSITION AND CAMERA: Match the reference's portrait aspect ratio. Place one product upright in the centre, with its front label facing directly toward the camera. Preserve the straight-on view, camera height, distance, and product's relative size within the frame. Keep the entire product visible with the same surrounding negative space.
PRODUCT ACCURACY: Preserve my product's exact shape, proportions, packaging colour, material, cap or dispenser, logo, typography, and label layout. Reproduce all visible label text accurately and sharply, following the packaging surface. Use the closure configuration shown in my product photo. Do not copy the reference brand or add a pump to a product that does not have one.
SPLASH EFFECT: Recreate the large glossy peach-beige liquid splash behind and around the product. Maintain the reference's irregular sculptural outline: a broad curved sheet spreading beneath the bottle, raised folds around its sides, a tall branching stream extending toward the top edge, thin lateral jets, delicate filaments, and small suspended droplets. Preserve the asymmetry, holes, curled edges, and rounded drips. The liquid forms a shallow cradle around the product while its front label remains unobstructed. Match the creamy viscosity, realistic surface tension, smooth thickness transitions, and wet highlights. Capture the splash frozen at the same instant.
LIGHTING: Match the soft directional studio light from the upper-left, warm highlights along the splash ridges, subtle reflections on the packaging, and deeper shadows beneath the bottle and lower-left splash. Preserve the reference's contrast and shadow softness. Give the liquid and product consistent lighting and believable contact shadows.
BACKGROUND AND TEXTURE: Seamless matte warm terracotta-peach background matching Image 1, with the same subtle tonal gradient. Retain realistic packaging texture, glass translucency or surface finish where applicable, and detailed liquid reflections. Keep the product and main splash sharply resolved, with fine droplets naturally defined. Premium commercial product photography, high resolution, realistic materials and fluid behaviour. No added text, watermarks, extra products, distorted packaging, invented lettering, excessive droplets, or changes to the reference camera angle and splash arrangement.
04. Macro brush with pouring cosmetic liquid
A square macro composition focused on the relationship between a makeup brush, cosmetic formula and gravity.
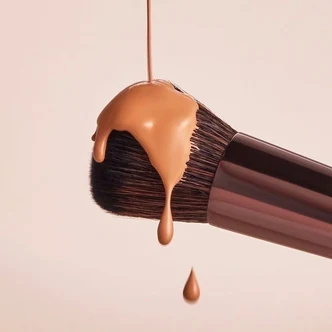
This is the original square brush reference from the PDF. No separate generated brush example was supplied.
Copy this complete prompt into your image editor:
Create a photorealistic macro beauty campaign image matching Image 1's exact camera angle, composition, lighting, textures, and dripping effect. Use my product from Image 2 to define the cosmetic formula's colour, finish, and consistency. If my product is a makeup brush, replace the reference brush with my exact brush.
COMPOSITION: Square 1:1 frame. A dense makeup brush enters from the right edge, angled slightly upward toward the left. Its rounded bristle head occupies the centre-left, while the glossy dark metallic ferrule extends beyond the right edge. Preserve the reference's close crop, brush tilt, side-on macro perspective, and negative space. No product bottle added to the frame.
LIQUID AND DRIPS: A narrow, continuous stream of cosmetic liquid descends vertically from the top edge onto the upper surface of the bristles. It forms a thick, glossy coating over the brush head, with a short rounded drip on the left and a longer tapered drip near the centre ending in a bulb-shaped droplet. One detached teardrop hangs beneath it in midair. Match the reference's stream position, coating silhouette, drip lengths, and suspended droplet placement. Preserve realistic gravity, viscosity, surface tension, and the way the formula rests on and penetrates the bristles.
TEXTURE: Resolve individual dark brown bristles, fine lighter strands, natural variations in fibre thickness, and subtle bending beneath the liquid's weight. Maintain believable separation between wet coated fibres and dry exposed fibres. Reproduce the ferrule's smooth reflective finish, curved highlights, and warm studio reflections. The liquid has a smooth creamy surface with controlled glossy highlights.
LIGHTING AND BACKGROUND: Match the soft directional studio illumination from the upper-left/front, the bright highlights on the liquid, and gentle shadows between the bristles. Preserve the pale blush-beige seamless background, warm colour balance, exposure, and subtle tonal gradient.
PRODUCT FIDELITY: Match my cosmetic's actual shade and material behaviour without inventing glitter, foam, or transparency. For a replacement brush, preserve its exact head shape, bristle colour, ferrule, handle materials, and visible branding while maintaining the reference pose and crop. Premium macro product photography, crisp brush and liquid detail, realistic optical depth, high resolution. No added text, watermarks, extra droplets, splash explosion, plastic-looking bristles, distorted brush geometry, or changes to the camera angle.
05. Two products on layered shade swatches
An overhead product composition with a light-to-dark shade story expressed through layered cosmetic swatches.
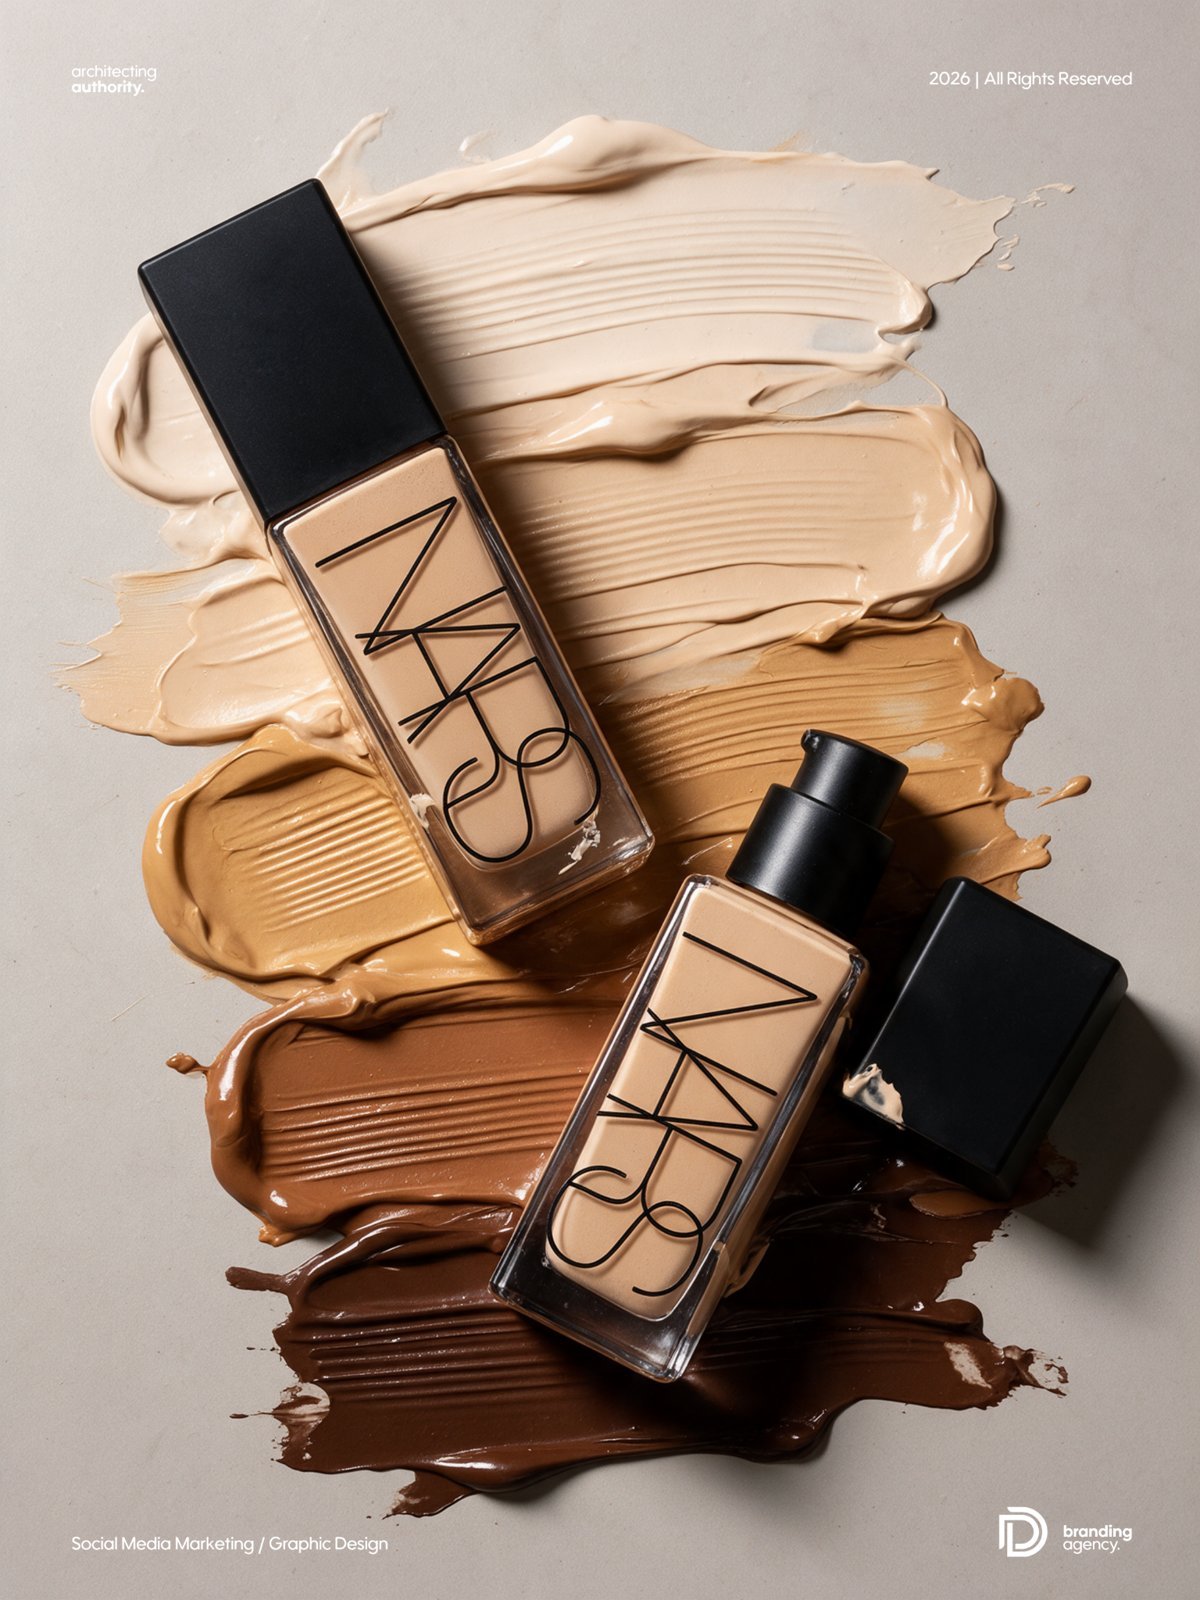
View original scene reference (Image 1)
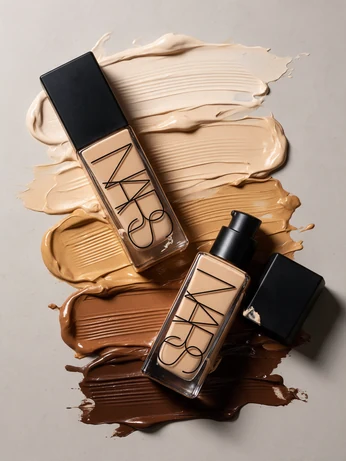
Copy this complete prompt into your image editor:
Create a photorealistic luxury cosmetic campaign photograph using Image 1 as the exact reference for composition, camera angle, lighting, cream textures, and product placement. Replace both reference bottles with my product from Image 2.
CAMERA AND COMPOSITION: Portrait 4:5 frame. Match the overhead flat-lay camera angle, looking directly down onto a warm grey-beige matte surface. Preserve the reference's framing and spacing. Place one closed product in the upper-left, tilted with its top pointing toward the upper-left and its base toward the lower-right. Place the second product in the lower-right, with its top pointing toward the upper-right and base toward the lower-left. If my packaging has a removable cap, position the matching detached cap beside the second product, following the reference. Preserve my product's actual opening mechanism.
CREAM SWATCHES: Recreate the stacked, overlapping foundation strokes beneath the products, progressing from pale ivory at the top through beige, golden tan, caramel, and medium brown to deep chocolate at the bottom. Match each stroke's position, width, direction, and irregular outline. Preserve the thick rounded ridges, fine parallel spreading grooves, tapered scraped edges, and smooth glossy surfaces. The swatches should look physically spread with a cosmetic spatula, with realistic thickness and subtle shadows where they overlap.
PRODUCT ACCURACY: Preserve my product's exact silhouette, proportions, packaging colours, materials, closure, logo, typography, and printed label details. Keep branding correctly aligned and legible on the angled packaging. Do not transfer the reference brand or its wooden cap design to my product unless those features exist in my uploaded packaging. Retain realistic reflections, translucency, and material texture.
PRODUCT AND CREAM INTERACTION: Match the small creamy smears on the sides of the products, adapting their placement to my packaging. Keep the main branding visible. Reproduce believable contact shadows where the products rest on the thick swatches, with no floating appearance or liquid passing through the packaging.
LIGHTING: Soft directional studio light from the upper-left, creating gentle highlights along the cream ridges and packaging, with shadows falling toward the lower-right. Preserve the reference's warm neutral colour balance, exposure, contrast, and shadow softness. Premium editorial product photography, sharply resolved cream grooves and packaging detail, realistic materials, high resolution. No added text, watermarks, extra props, extra products, distorted labels, perfectly uniform swatches, or changes to the camera angle.
06. Single product on a ribbed caramel surface
A minimal overhead still life that contrasts clean packaging with a tactile ribbed caramel surface.
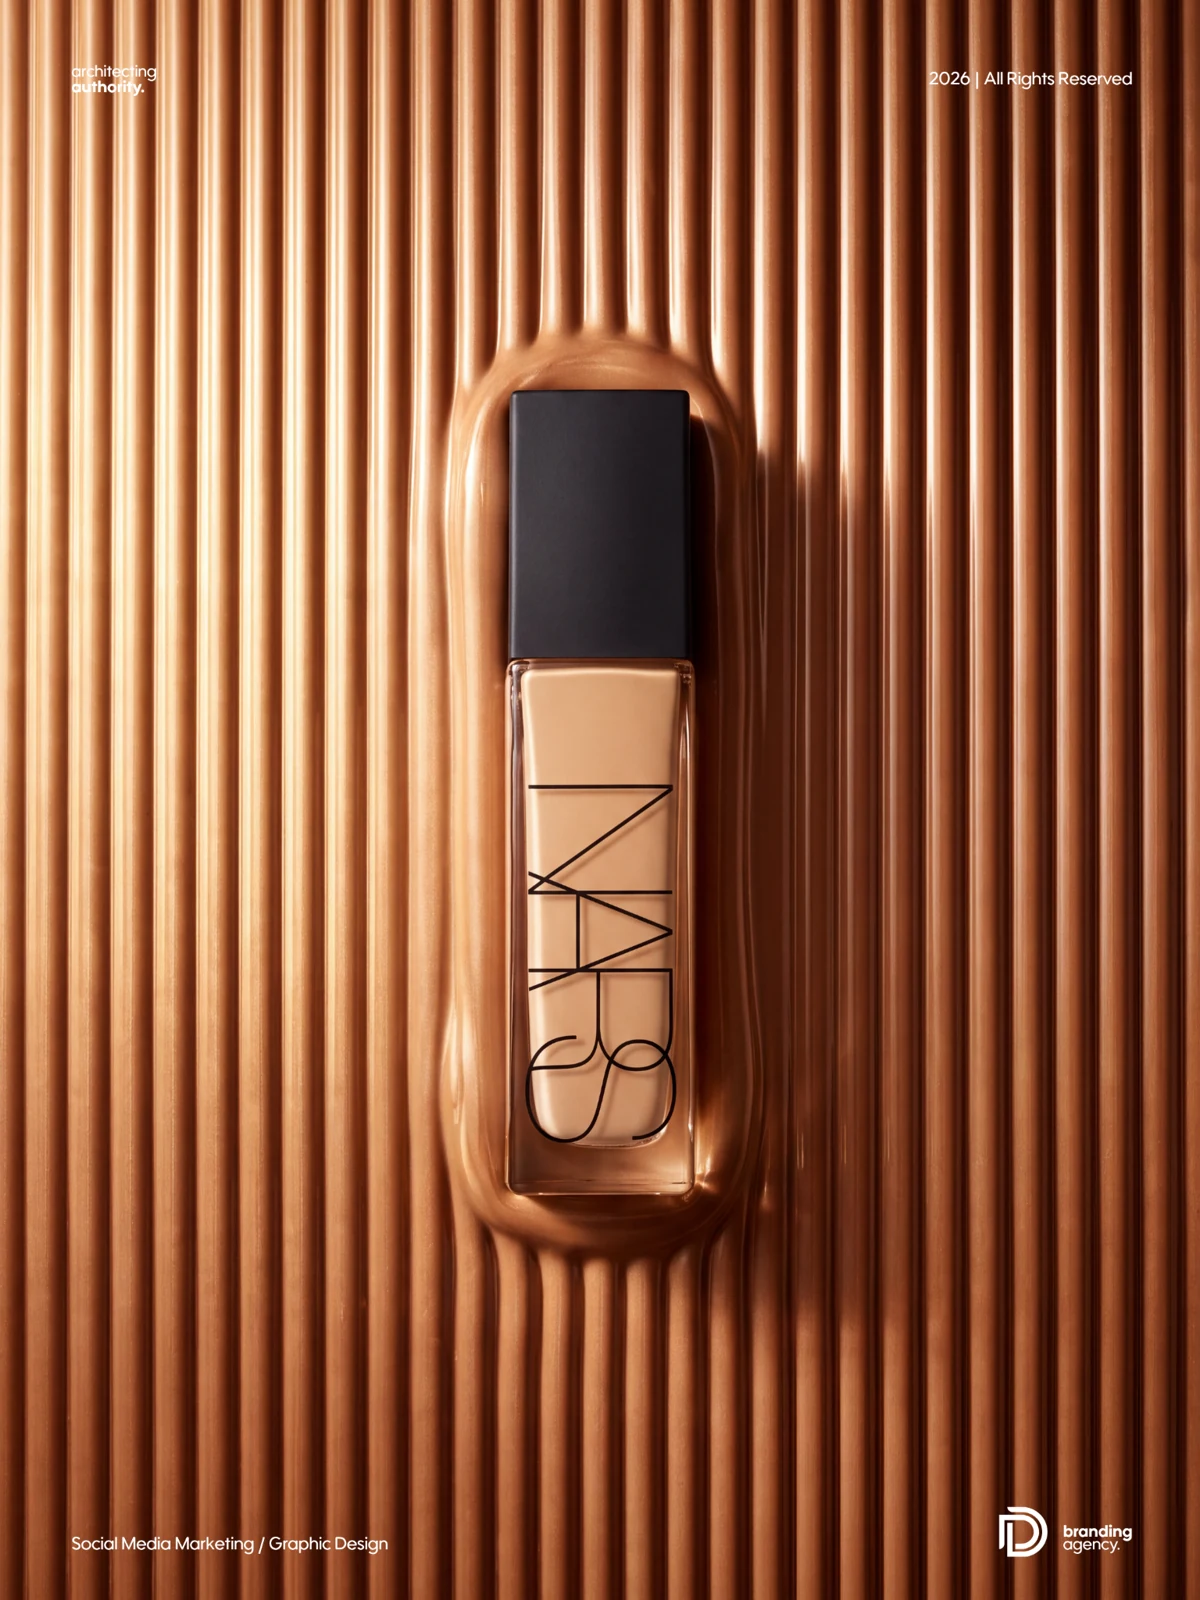
View original scene reference (Image 1)
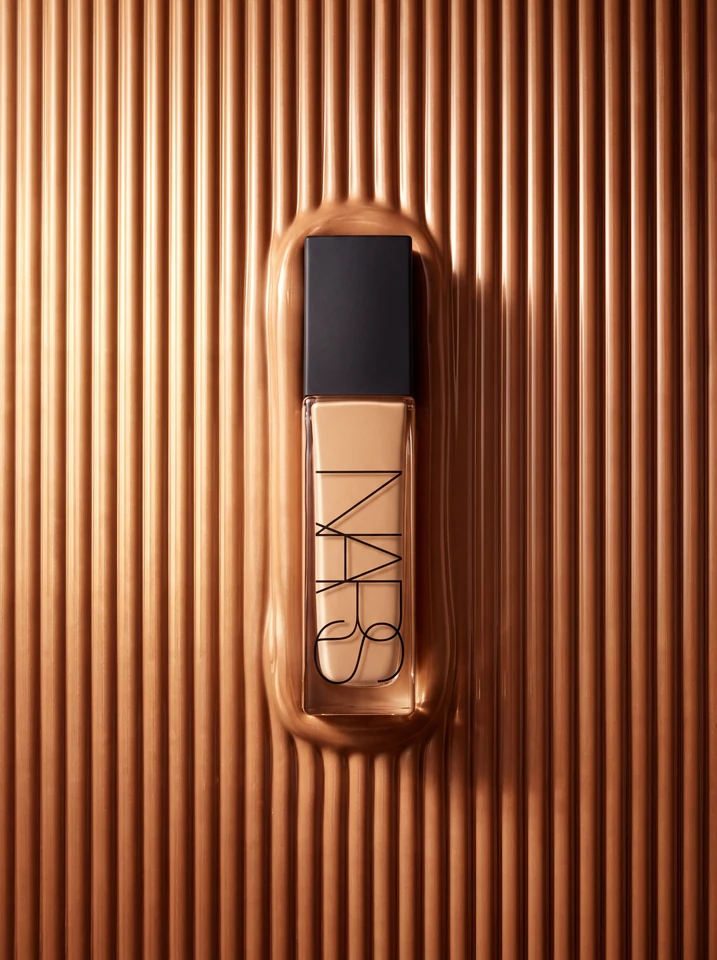
Framing note: the original prompt requests landscape framing; the supplied example is portrait. Keep the wording below intact and choose the frame required for your final deliverable.
Copy this complete prompt into your image editor:
Create a photorealistic premium product campaign image using Image 1 as the exact reference. Replace the central foundation bottle with my product from Image 2, preserving the camera angle, framing, lighting, background texture, and shadow direction.
COMPOSITION AND CAMERA: Match the reference's landscape aspect ratio and overhead flat-lay perspective. Position one product centrally, with its top pointing toward the top edge and its front label facing directly toward the camera. Preserve the reference's product scale and surrounding space. Keep the entire product visible without changing its proportions.
BACKGROUND AND TEXTURE: Recreate the continuous warm caramel-bronze surface with closely spaced vertical ribs running from the top to the bottom edge. Match the rounded raised ridges, narrow recessed channels, glossy highlights, and smooth creamy texture. Around the product, the ribbed material softens into a shallow indentation that follows its silhouette, with subtly curved ridges and a thicker liquid-like border. Adapt this indentation to my product's actual shape.
LIGHTING: Match the strong directional light from the upper-left. Preserve the bright golden highlights along the left sides of the ribs, deep shadows inside the channels, and the prominent product shadow extending to the right and slightly downward. Maintain the gradual transition from a bright left side to a darker right side, with the same warm colour balance and contrast.
PRODUCT ACCURACY: Preserve my product's exact shape, dimensions, packaging colours, materials, closure, logo, typography, and label artwork. Keep every visible printed detail sharp and correctly positioned. Reproduce realistic reflections and surface texture under the scene's lighting. Use my product's original cap and packaging design.
INTEGRATION: The product rests naturally within the textured surface, with believable contact shadows and subtle reflected caramel light along its edges. Keep the front label unobstructed. High-resolution commercial product photography with crisp ribbed texture and realistic materials. No added text, watermarks, extra products, warped packaging, invented lettering, horizontal ribs, or changes to the reference composition.
07. Horizontal product stack with a hanging drip
A stacked-product composition with intentional edge cropping and one physically connected hanging drip.
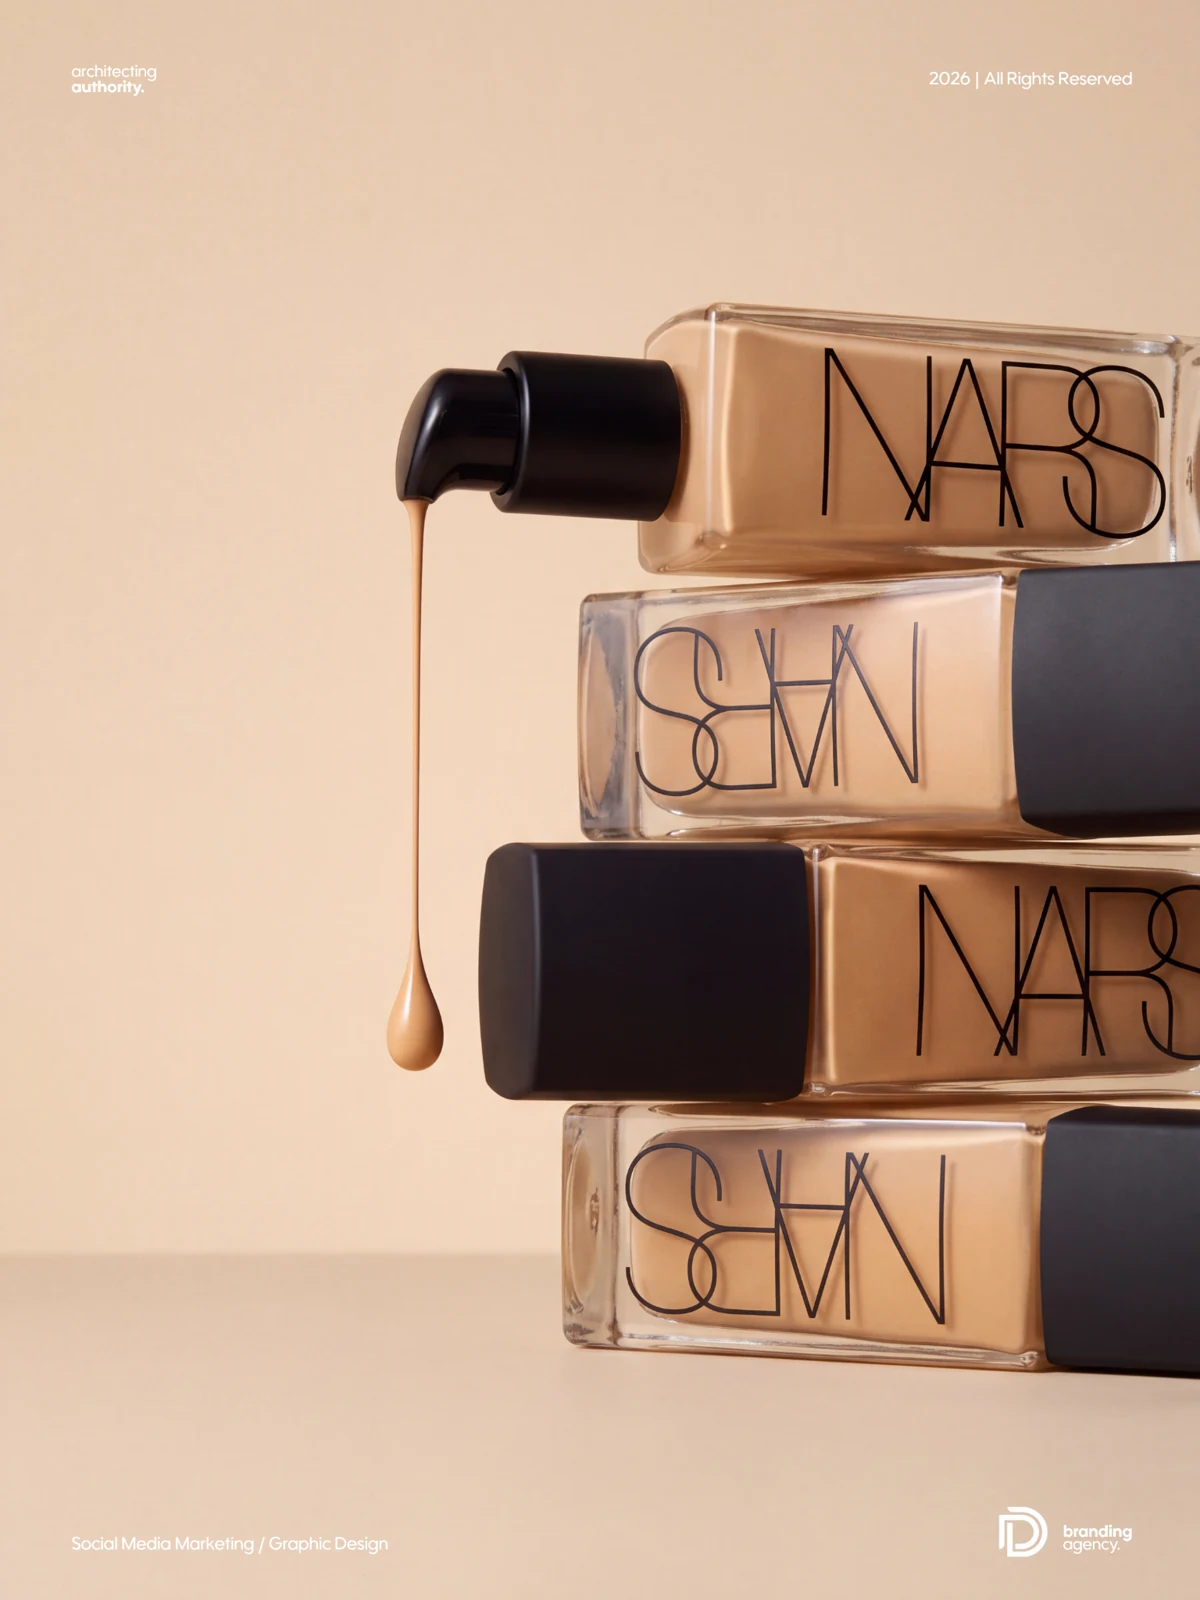
View original scene reference (Image 1)
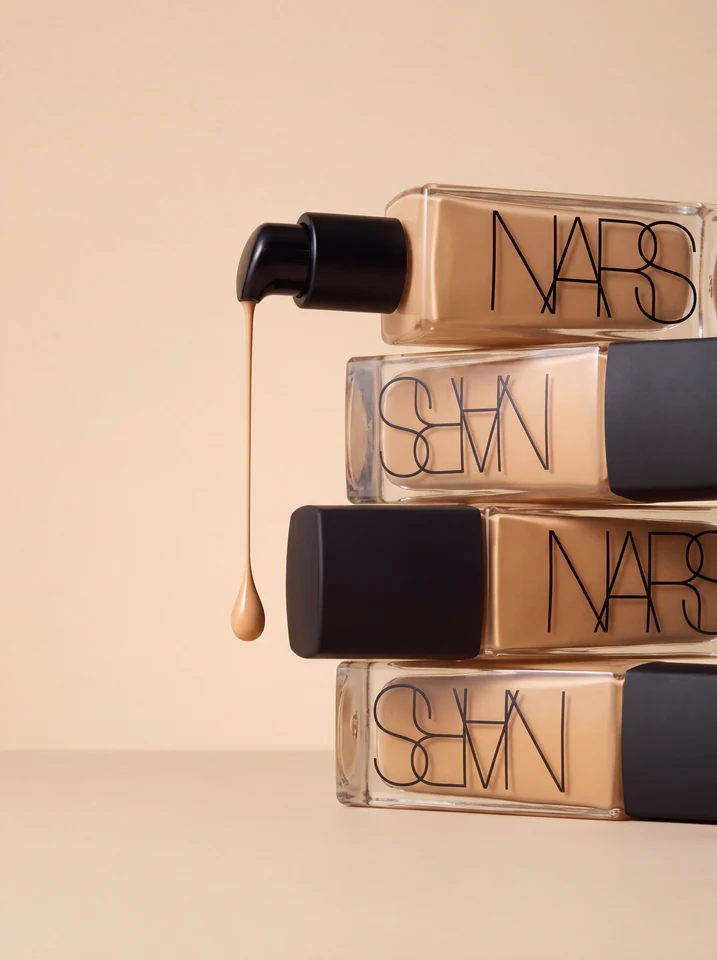
Copy this complete prompt into your image editor:
Create a photorealistic luxury product photograph using Image 1 as the exact reference for composition, camera angle, lighting, stacking arrangement, and dripping effect. Replace the reference bottles with my product from Image 2.
COMPOSITION: Portrait 4:5 frame. Recreate the stack of four products lying horizontally across the right side of the image. Alternate their orientation: the top product's dispenser points left; the second product's closure points right; the third product's closure points left; and the bottom product's closure points right. Preserve the slight tilts, overlaps, contact points, and intentional cropping at the right edge. Maintain the generous empty space on the left.
CAMERA ANGLE: Match the reference's close, low frontal perspective, with a subtle view of the products' upper surfaces and the supporting floor. Preserve the camera height, distance, perspective, and original framing. Keep each front label oriented toward the camera, with its artwork rotating naturally with the horizontal packaging.
TOP PRODUCT AND DRIP: The top product is uncapped, with its actual dispenser extending into the upper-left area. A fine strand of warm beige cosmetic liquid hangs vertically from the downward-facing outlet, ending in an elongated rounded droplet. Match the reference's drip placement, length, thickness, and glossy texture. Use my product's real dispensing mechanism; do not invent a pump or nozzle absent from my packaging.
PRODUCT ACCURACY: Preserve my product's exact silhouette, proportions, packaging colours, cap shape, materials, logo, typography, and label artwork across all four copies. Keep visible printed text sharp and correctly aligned. Reproduce realistic glass thickness, translucency, frosted surfaces, or other finishes according to my product photo. Preserve the true packaging shape while adapting the stack around it.
LIGHTING AND BACKGROUND: Match the soft warm directional light from the upper-left, creamy highlights, gentle reflections, and natural shadows beneath and between the products. Use the same seamless pale sand-beige background and matte surface, with subtle tonal variation and no visible horizon. Preserve the warm exposure and restrained contrast.
REALISM: Give the stack believable balance, weight, and contact shadows. Retain fine packaging texture, realistic reflections, and smooth liquid surface tension. Keep the products clearly resolved with natural optical depth. Premium commercial product photography, high resolution. No added text, watermarks, extra props, extra products, distorted labels, altered packaging proportions, or changes to the reference camera angle.
08. Model holding a product diagonally across one eye
A close-up beauty portrait where the diagonal product creates a strong visual line without hiding the visible eye.
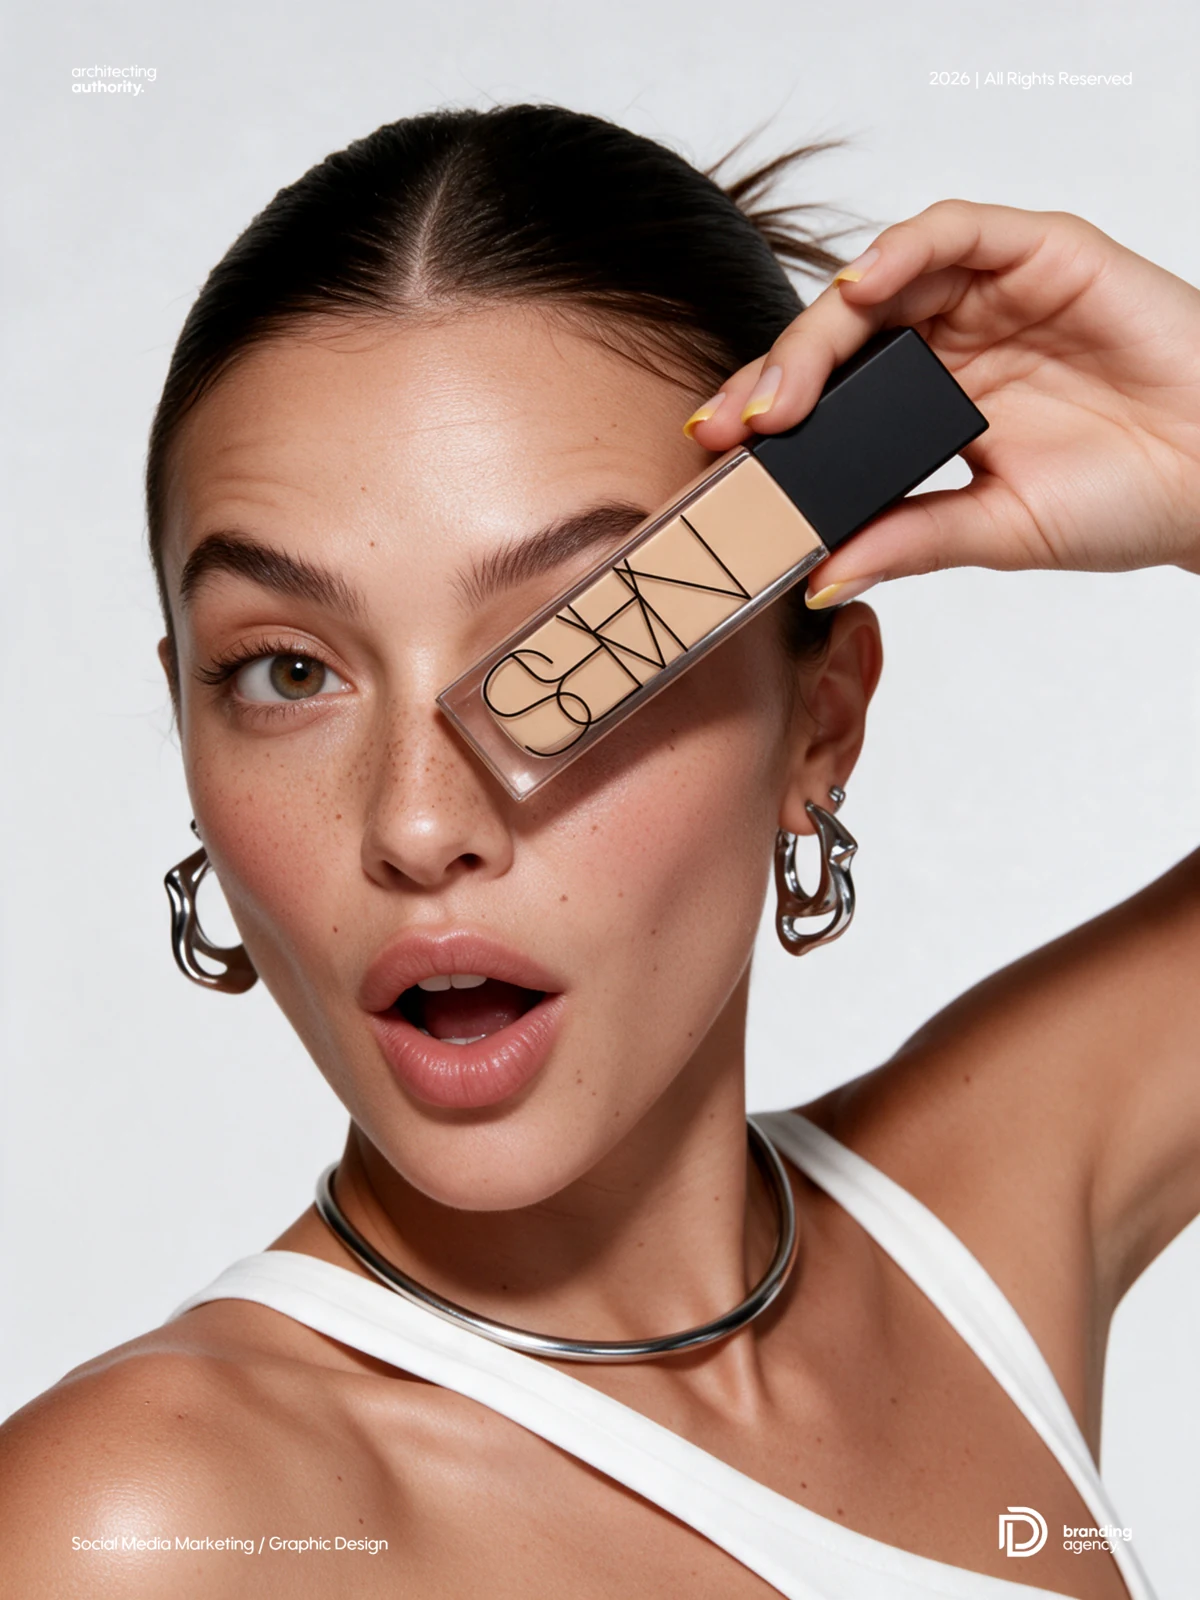
View original scene reference (Image 1)
Copy this complete prompt into your image editor:
Create a photorealistic editorial beauty photograph using Image 1 as the exact reference. Replace the tube held beside the model's eye with my product from Image 2. Preserve the model's skin tone, skin texture, facial features, expression, hand position, camera angle, lighting, styling, and framing.
CAMERA AND COMPOSITION: Match the reference's portrait aspect ratio and tight head-and-shoulders crop. Keep the camera at eye level with the same subtle three-quarter facial angle, perspective, and distance. Her face fills most of the frame, with pale grey-white negative space above her head. Preserve the original shoulder and raised-arm cropping.
EXPRESSION AND FACE: Maintain her direct gaze through the visible eye, raised eyebrows, and slightly open, rounded lips expressing playful surprise. Preserve the exact eye colour, catchlights, nose shape, lip contours, natural facial asymmetry, and visible beauty marks. Keep the replacement product diagonally across the eye on the viewer's right, matching the reference's degree of facial coverage.
SKIN TONE AND TEXTURE: Maintain the warm golden-tan skin tone and original undertones across the face, neck, shoulders, arm, and hand. Retain visible pores, freckles across the nose and cheeks, fine peach fuzz, subtle blemishes, natural under-eye texture, and realistic lip lines. Preserve the rosy cheek colour, soft skin sheen, and original highlights. No whitening, excessive tanning, smoothing, waxy skin, or artificial pore patterns.
HAND AND PRODUCT POSITION: Her hand enters from the upper-right, holding the product near its upper end between naturally bent fingers. Match the original pinch grip, finger placement, nail length, rounded nail shape, and yellow French-tip manicure. Keep the product's lower end pointing diagonally toward the lower-left beside the bridge of her nose. Adapt finger contact only as needed to fit my product's actual shape, preserving realistic pressure, anatomy, and scale.
PRODUCT ACCURACY: Preserve my product's exact silhouette, dimensions, proportions, packaging colours, material, closure, logo, typography, and label artwork. Keep visible branding sharp and correctly aligned with the diagonal packaging. Do not reshape my product into the reference tube or transfer the reference branding.
HAIR AND STYLING: Preserve the centre-parted dark brown hair pulled tightly back, fine hairline strands, and loose tips above the head. Maintain the sculptural silver hoop earrings, small ear stud, silver neck ring, and white asymmetric garment straps. Retain natural metal reflections and fabric texture.
LIGHTING: Match the reference's soft directional studio light from the upper-left/front, gentle shadows beneath the nose, lips, and chin, and luminous highlights on the forehead, cheeks, and shoulders. Preserve the original exposure, contrast, colour balance, and clean pale grey-white background. High-resolution beauty photography with natural skin detail and clear product branding. No added text, watermarks, altered expression, extra fingers, distorted jewellery, blurred labels, or changes to the camera angle.
09. Winking model balancing a product across her lips
A playful portrait built around a wink, natural skin detail and a carefully balanced product at mouth level.
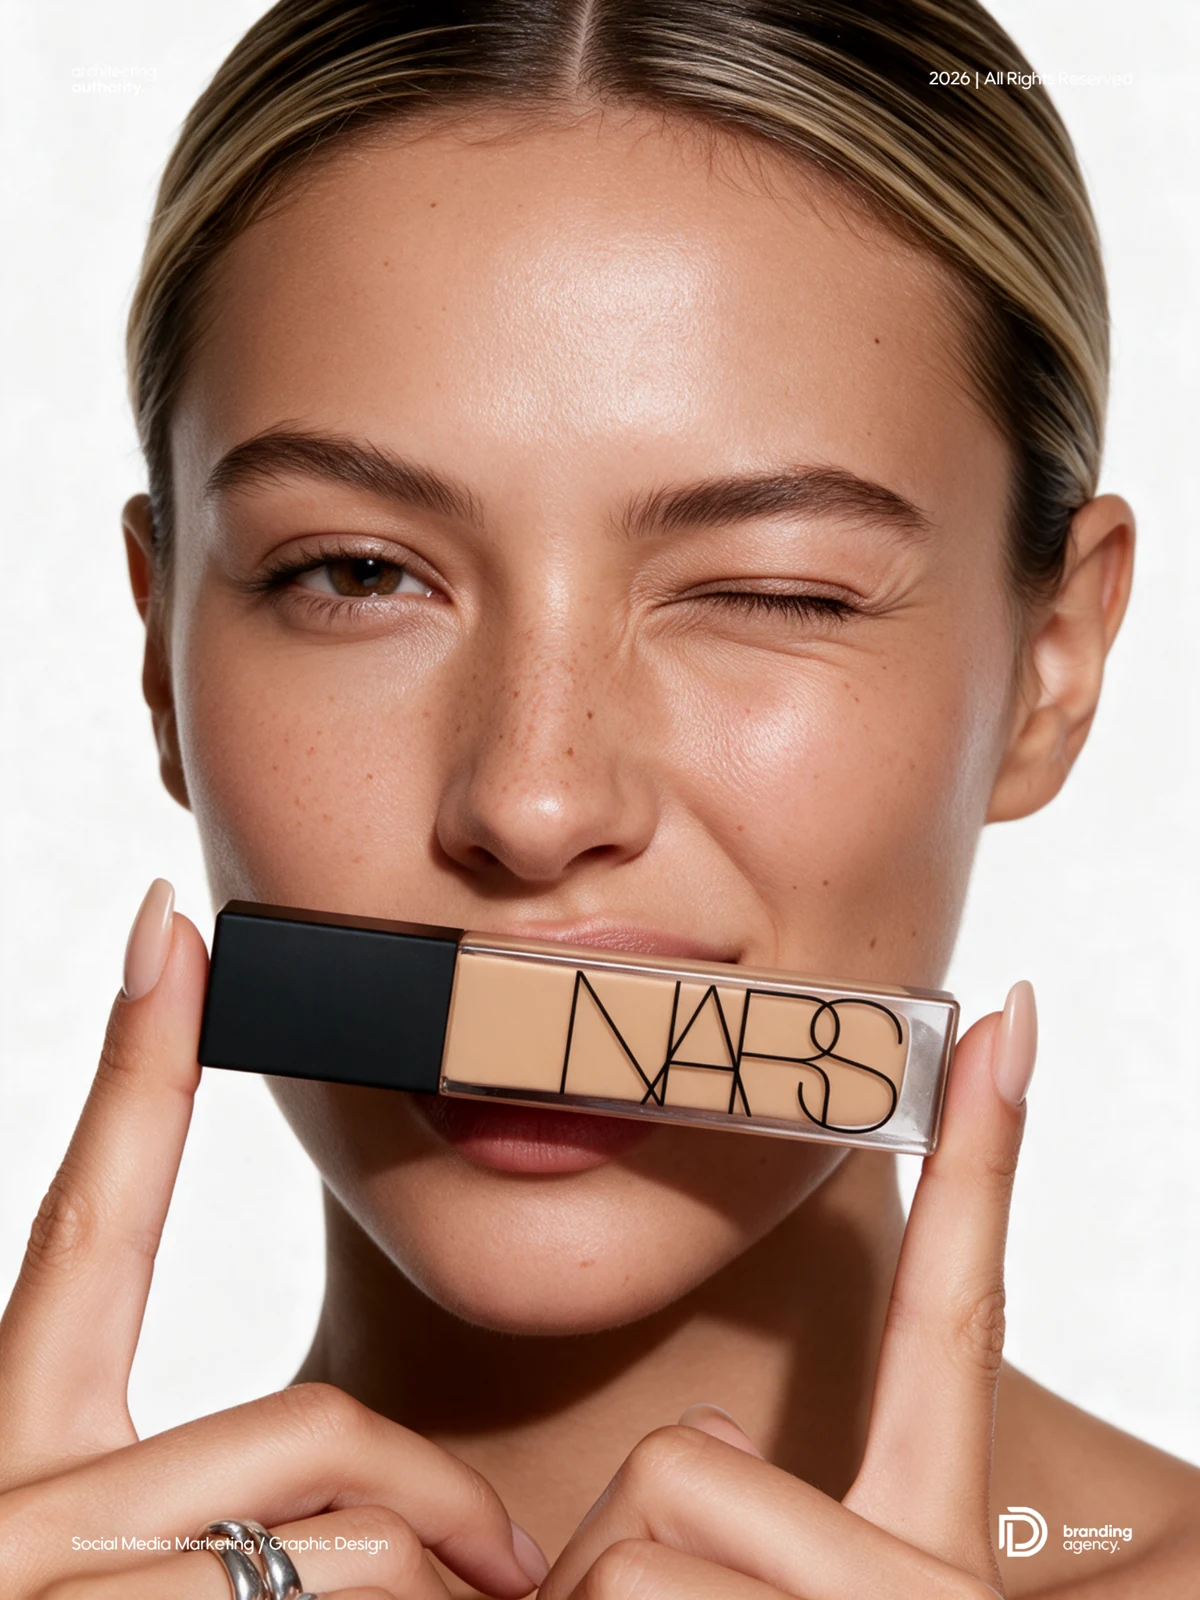
View original scene reference (Image 1)
Copy this complete prompt into your image editor:
Create a photorealistic editorial beauty portrait using Image 1 as the exact visual reference. Replace the brown lip-product tube with my product from Image 2. Preserve the model's identity, skin tone, skin texture, expression, hand placement, camera angle, lighting, and framing.
COMPOSITION AND CAMERA: Vertical 3:4 close-up portrait against a clean white studio background. Match the eye-level camera, subtle three-quarter facial angle, tight crop, and perspective. The model's face fills the frame, with the top of her hair cropped and her neck and upper shoulders visible below.
EXPRESSION: Preserve the playful wink of the eye on the viewer's right, the open eye looking directly toward the camera, and the relaxed, softly parted lips. Match the original eyelid positions, eyebrow shapes, gaze, nose contours, jawline, and facial asymmetry.
SKIN TONE AND TEXTURE: Maintain the reference's warm golden-tan complexion and natural undertones across the face, neck, and hands. Preserve fine pores, subtle freckles across the nose and cheeks, peach fuzz, small beauty marks, delicate under-eye creases, and natural lip lines. Reproduce the luminous sheen on the forehead, nose, and cheekbones, with softly shaded skin elsewhere. Keep the nude rose lip colour and understated makeup. No whitening, excessive smoothing, waxy skin, or artificial pore patterns.
PRODUCT AND HAND POSITION: Position my product horizontally across the model's mouth, matching the reference's height, alignment, and distance from her face. Its front branding faces the camera. Two raised index fingertips lightly support its opposite ends; preserve this delicate balancing gesture. Keep the other visible fingers softly bent beneath the chin, following the reference. Maintain realistic finger lengths, knuckles, skin folds, glossy nude almond-shaped nails, and the chunky silver rings on the hand at the lower-left. Adapt fingertip contact only as needed for my product's actual dimensions.
PRODUCT ACCURACY: Preserve my product's exact shape, proportions, packaging colour, material, cap, logo, typography, and label artwork. Keep visible printed text sharp and aligned with the packaging. Preserve its real size relative to the face and hands. Do not stretch or reshape it into the reference tube.
HAIR AND LIGHTING: Match the centre-parted, smoothly pulled-back dark blonde hair with lighter highlights, individual strands, and natural hairline detail. Preserve the soft frontal studio illumination, slightly stronger from the upper-left, with gentle shadows beneath the product, nose, chin, and fingers. Maintain the reference's exposure, colour balance, and contrast. High-resolution beauty campaign photography with natural skin and realistic packaging reflections. No added text, watermarks, extra fingers, altered wink, distorted nails, blurred branding, or changes to the camera angle.
A practical quality check before you publish
- Packaging: confirm the exact shape, colors, logo, label spelling, cap and proportions.
- Liquid: check gravity, viscosity, connected drips and the real dispensing mechanism.
- Portraits: inspect skin texture, fingers, grip, eyes, jewelry and product scale.
- Composition: compare product count, camera angle, negative space and crop with Image 1.
- Delivery: export at the frame and resolution required by your campaign, then check the label at full size.
Download the original nine-prompt PDF with its scene references.
Questions, answered.
What is an AI beauty product replacement prompt?
It directs an image editor to borrow a scene’s composition and lighting while replacing the pictured packaging with your own product. In this guide, Image 1 defines the scene and Image 2 defines the product.
Which images should I upload with each prompt?
Use the original scene reference shown in the matching section as Image 1 and a sharp, evenly lit photograph of your real product as Image 2. The example image shows a possible visual direction; it is not a substitute for your own packshot.
Which tool can use these prompts?
Use an image-generation or editing tool that accepts multiple image references and written instructions. The source document does not name a specific tool or model. Results and reference handling depend on the tool you use.
How can I keep the logo and label accurate?
Start with a readable front-facing packshot. Keep the prompt’s product-accuracy instructions and compare spelling, typography, placement, cap shape and proportions against the real product. Correct these details before refining styling.
Are all the prompts and examples the same aspect ratio?
No. The complete prompts specify their own framing, including 3:4, 4:5 and square compositions. Prompt 6 asks for landscape framing, while its supplied visual example is portrait. Follow the prompt for the required deliverable and set that ratio in your tool.
Why does the brush prompt have no separate output example?
The supplied document includes the original square brush reference, but no separate generated brush image was provided. For this prompt, Image 2 defines the cosmetic formula or replacement brush; do not add an unnecessary bottle to the application scene.
Can I adapt these prompts to other beauty products?
Yes. Use your actual product photograph and retain its real shape, closure, materials and label. If your packaging has no removable cap or exposed dispenser, follow the conditional instructions and avoid inventing one.
Found your next idea?
Explore prompt packs